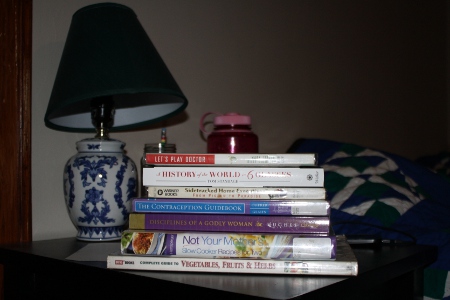
A Lamp’s Tale

Snap, crackle, pop.

The sound wasn’t coming from my breakfast cereal.

It, along with a brief flash of light, was coming from my bedside lamp.

I rolled over, flicked the switch toggle back and forth to confirm. The lightbulb was burned out.

Books in Progress

Periodically through the next several weeks, I would reach over to turn the lamp on, only to rediscover that the lightbulb was burned out. Since I generally only turn the light on to read in bed, I generally don’t feel like changing a lightbulb just then. So I’d reach across the bed to Daniel’s nightstand and turn on his bedside lamp.

Finally, one lunchtime, I decided to actually change the bulb.

I pulled out my step-stool, climbed to the cabinet of lightbulbs, dug through the lightbulbs for prospective candidates. My bedside lamp has to have a low wattage, since I don’t want my body to think it’s daytime–and the bulb has to be able to handle the little wire clip that holds the shade on (something CFCs have a hard time doing.) After a bit of digging, I found two prospects: a CFC that might not work with the shade and an incandescent bulb that might be too high wattage.

I took off the shade, unscrewed the lightbulb. I screwed on the new CFC and flipped the switch.

Nothing.

Darn it all. I knew I should have been labeling those CFC that I was putting back in boxes until I could dispose of them at the Hazardous Waste place.

I unscrewed the CFC, returned it to its box, and screwed in the new incandescent bulb.

I switched the light on–and got nothing again.

Double darn it all.

Whatever caused the snap, crackle, and pop must have destroyed the lamp’s wiring. I like the lamp, it matches my blueware. I’ll have to rewire it some day–but for now, I guess I’ll just replace it.

I reached down to unplug the lamp–

and discovered that it was already unplugged.

That snap, crackle, pop?

My lamp coming unplugged months ago.

Yeah. Welcome to my life :-)


Settling into our room

When we moved me down to Wichita, Daniel was sleeping in the bedroom next to the bathroom–the one with a door to the backyard in it. He had a queen sized bed, a chest of drawers that was missing most of its handles, a little plastic chest of drawers, and a laundry hamper.

We cleared the room next door for my scads of boxes.

We’d decided fairly quickly that we’d use that room, isolated from pipes that make noise and from doors to the outdoors, as our bedroom–so I made switching the two rooms one of my first priorities.

That put what furniture he and I had into position.

About two weeks before our wedding (when I started thinking about my move into the house), I decided it was time that I made the bed properly.

Now, four and a half months since my move to Wichita (and two months since my move into Betsy), our bedroom is starting to feel like a real bedroom.

Our bed now sports my hope chest quilt–the quilt I started when I was fourteen and didn’t finish until I was 24 (ish). The nightstands we purchased with wedding gifts are now positioned on either side of the bed. And the contemplated headboard has failed to materialize and spare dollars have been reallocated to paying back my school loans–which means I guess I’d better get searching DIYs on Pinterest if I really want a headboard.

Bedroom

The dresser I’d used in Columbus now sits next to my closet door–and contains Daniel’s clothing. At first, he’d asked me if I had any extra dresser space available that he could use–but the more I looked at HIS dresser, the more I became convinced that it should not be used in our bedroom. Half of the time I couldn’t even open the drawers.

Bedroom

I finally mounted the shelf my friend Kathy gave me at my shelf party a couple of years ago (back when I had determined that I was past hope of marrying.) Above it, I arranged my collection of blueware.

Bedroom

Against the next wall, my quilt rack boasts a quilt from my great-aunt (on the back), my “egg blankie” (a small crocheted blanket made for me by a woman from our church when I was a baby”, and the lovely quilt my Mom and sisters made for Daniel and I for our wedding. Since I have both my hope chest quilt and my wedding quilt, I alternate which one I have on the bed every couple of weeks. (Actually, the wedding quilt is currently on the bed-it’s been a couple of weeks since I took these photos.)

Bedroom

The final corner of our bedroom contains my dresser, with my jewelry board and our hamper beside it. The big bare wall will eventually hold something–but I’m waiting until we finish our entertainment center for the living room before I do too much hanging of pictures. Until that piece of furniture is done and in place, I’m not sure exactly what I’ll want where. So, for now, I wait.

Bedroom

It’s not completely done, but it is starting to look settled. Like a home instead of a dorm room. It’s wonderful to have a haven of rest in the midst of our still-settling-in-house.


Wichita is NOT the promised land

When the pastor of my childhood church learned that I would be moving to Wichita, he gave me a knowing smile.

“Moving to the Promised Land,” he declared.

He, being a native of the greater Wichita area, would say such a thing.

I was a little surprised when our pastor in Wichita used the same phraseology to describe Wichita.

“Why does everybody call Wichita the Promised Land?” I asked him.

He had no good answer–and really wasn’t aware that anyone besides himself referred to the town thus.

Nevertheless, I have definitively decided that both pastors are wrong. Wichita is NOT the Promised Land.

The Promised Land, you see, is a land flowing with milk and honey. Groceries should be easy to come by in such a place.

Wichita is no such place.

Wichita has three grocery stores: Dillons, Wal-Mart Marketplace, and ALDI. No problems there, necessarily. After all, I come most recently from Columbus, where we had Hy-Vee, Super Saver, and Walmart. I got along just fine there.

But Wichita is more than 15 times bigger than Columbus. Yet while I could easily find everything on my list in just one of Columbus’s stores (I frequented the Super Saver), I have to visit three different stores in Wichita and still go home without my list being fulfilled.

Last night, after I was forced to return home without potted ginger, coconut milk, red curry paste, and molasses, I declared to my husband that sometimes I think I hate this town.

It’s probably an over-reaction. I know it’s an over-reaction. But food is a pretty important part of my life–and the process of procuring food in Wichita, KS is enough to make me pull out my hair.

Really, I was spoiled growing up.

I grew up going to SuperSaver in Lincoln. My closest SuperSaver just happened to be the SuperSaver just south of the majority of Lincoln’s ethnic population. It catered to the needs of the masses.

There, I could find Omega Eggs (researchers from UNL developed the process of enriching eggs with Omega-3s by adjusting the chicken’s diets). There, I could buy a whole range of Mexican, Chinese, Thai, and Vietnamese ingredients. There, I had ready access to R.U.Nuts bulk foods, perfect for making my own trail mixes.

Here?

I can get Omega eggs at the Dillons on West and Central (but not at 21st and Amidon). I can buy Mexican ingredients at the Dillons on 21st and Amidon. Rumor has it there’s an Asian market somewhere where I can find my curry paste. And I can get bulk nuts and candy (but not fruit) at the Nifty Nut House.

But molasses?

I haven’t figured out where to find that yet.

Wichita is NOT the Promised Land.


To be fair, Wichita does have some advantages as food goes. Braums has the tastiest milk ever (I’m actually drinking milk on occasion these days, and I definitely enjoy what’s left in my cereal bowl). The Spice Merchant has fantastic coffee, tea, and buy-by-the-ounce spices. But I still pine for the one-stop-shopping convenience of my used-to-be-local Super Saver.


The Betsy Kitchen

The process of arranging my belongings into Daniel’s house (which I have affectionately named Betsy) has been a long one.

Betsy is small and both Daniel and I have a lot of stuff.

It took me four weeks to declare the first room of the house (the kitchen) done (and even now, there’s plenty I’d like to do with Betsy’s kitchen at some point.)

Future plans notwithstanding, I feel a little surge of joy every time I walk into Betsy’s kitchen-the joy of knowing that things are in order.

My kitchen

While Betsy’s kitchen is Tiny (note the capital “T”), it does have the advantage of having cupboards all the way to the ceiling. I can’t say how much I appreciate this. The little corner shelves are an additional plus–in this case, they’re holding my super-abundant drink stuff (coffee/tea/hot chocolate).

My kitchen

The kitchen has an angled sink–which means there’s a triangle of only partly usable space behind it. Initially, this was a repository for recyclables, paint brushes in jars, and pretty much anything else that didn’t have a home. I cleaned it up, found a home for everything (or moved it to another room until a home can be found for it), and placed a cheery red fruit dish in the empty space.

My kitchen

The ladies in Columbus showered me with money with which to purchase a pantry–and boy, is it wonderful to have one. We bought a standard-issue fiberboard cupboard and Daniel cut me some additional shelves for it. It’s nice to have all my dry goods (flour and sugar and beans and rice and…) all together in one place. Thanks ladies!

I didn’t intend for the kitchen’s color scheme to end up turquoise and red–but when I got to the top of the fridge, I knew I wanted something to corral the miscellaneous items that make their way up there. Rooting through my belongings, I found two turquoise tubs (one from my Missionette’s days, one from a shower I gave for my sister-in-law) and a red bowl. If Pinterest is any indication, the scheme is something of a retro-mod fad these days–so I might just be unintentionally fashionable.

You can see one of those “projects to get done at some point” on the left side of the fridge. We want to build a very narrow shelf for canned goods in that space–but, until it’s done, I have boxes and boxes of home canned food stacked in that space.

My kitchen

There’s another of those little shelf units on the stove side of the room–and I’ve filled it with my cookbooks. For the most part, this works well, but I occasionally find myself losing a cookbook off the end. I really ought to put some of those cheapo bookends on my gift registry–but I’m incredibly lazy about updating said registry. Maybe…actually, how about I go do that now…

My kitchen

This last picture of the kitchen shows both the progress that we’ve made and the progress yet to be made. Before I came, there was a door attached to that doorway. The door opened toward the sink. The sink had absolutely no counter space beside it for dirty dishes. As a result, all dirty dishes were piled in the sink.

Now, I know a lot of women (and men) pile their dirty dishes in the sink as a matter of course–but I’m not too into that. In MY kitchen, I like to have my sink free to be used. I want to be able to fill a pan, soak a dish, peel potatoes, or fill up my sink with soapy water to do dishes WITHOUT having to empty the sink of dishes first. Which meant that getting something that could hold dirty dishes was a priority for me.

We ended up buying a little rolling cart that fits in the space between the sink and the doorway (we removed the door to make it fit). I can move the cart around the kitchen if I want to use it as an extra prep surface–and it gives me extra drawer/cabinet space underneath. The rolling aspect is pretty important, since the doorway gets a bit tight with it in place.

Of course, you can also see through the doorway down the steps–and see that I still have plenty of work to do getting the rooms apart from the kitchen in order.

But it’s nice to have a start.

I’m quite pleased with my Betsy kitchen.


Tutorial: Case for a Kindle Keyboard

I’m, er, rather rough on portable electronic devices. They get stuffed into my purse along with everything else that’s in there (at the very least a wallet, an inhaler, some pens, and my multitool–but the occasional/more-frequently-than-not scissors, book, device charger, etc.)

But when the screen on my Kindle went loopy after a quick trip in my purse (my best bet is that it knocked up against the multi-tool)… And when I couldn’t fix the problem by resetting the system… I knew I needed to do something to protect any future devices before I acquired them.

Not being one to shell out money for something that I’m certain could be made myself, I searched for tutorials rather than for items to purchase. What I found was this tutorial, which I read through and then adapted quite liberally to make my own cover, which I wanted to be hard-sided AND padded to provide extra protection from stray multi-tools.

Kindle Case

And, of course, I took pictures and wrote up the steps so that I could replicate the process should I so desire.

What You Need:

  • Chipboard (I didn’t have any chipboard handy enough so I used the inferior, but in this case still fairly sturdy regular cardboard from within an old binder)
  • Fabric for exterior of case
  • Fabric for interior of case
  • Quilt batting
  • Elastic (I used dollar store elastic headbands)

What You Need to Do:

1. Cut chipboard (using a straightedge and a utility knife) into the following:

  • Two 7 5/8″ x 5″ rectangles
  • One 7 5/8″ x 1 1/2″ rectangle

Cutting Chipboard

2. Cut exterior fabric into rectangle 14″ x 8 1/2″

3. Cut interior fabric and batting into rectangle 15″ x 9 1/2″

4. Pin batting to wrong side of interior fabric. Quilt through fabric and batting as desired (I did diagonal lines from either direction to make a diamond pattern)

Quilting interior fabric to batting

5. Cut quilted fabric down to a 14″ x 8 1/2″ rectangle

6. Cut 3 pieces of elastic ~7″ long

7. Lay out quilted fabric right side up so that the short sides make the sides and the long sides make the top and bottom. Mark points along the top edge 2 3/4″ from right side, 3 1/2″ from right side, and 6 1/2″ from right side. Mark the same points along the bottom edge. This will be where you’ll attach your elastic (see the photo below for approximately what that will look like.)

Marking and attaching elastic

8. Baste edges of elastic to marked points (I used a zig-zag stitch hugging the far side of the fabric.

9. Pin interior fabric to exterior fabric, right sides together.

Pinning fabric together

10. Sew top, right side, and left side together using a scant 1/4″ seam allowance.

11. Turn inside out and press corners to a point using your fingers or a crochet hook.

Turning the pocket inside out

12. Arrange elastic so that the center piece of elastic is on the exterior side and the other two pieces of elastic are on the interior side.

13. Slide 7 5/8″ x 1 1/2″ rectangle of chipboard into sewn pocket. Snug it all the way up to the seam.

14. Change the presser foot on your sewing machine to a zipper foot and sew as close as you can to the chipboard without sewing through the chipboard. (The dotted line on the photo below shows approximately where the edge of the chipboard is–and therefore where I sewed.)

Sewing close to the chipboard

15. Sew another line 3/4″ away from the seam you just made. (This time, the dotted line is a very approximate indicator of where that seam will be.)

Making the next seam

16. Slide one of the 7 5/8″ x 5″ rectangles of chipboard into sewn pocket so that it is snug against the seam you just made. Sew as close to the “open” side of the chipboard as you can without sewing through the chipboard.

17. Sew another line 7/8″ away from the seam you just made.

18. Snug in your final piece of chipboard. At this point, if you were to fold your case up, it would look something like the picture below (except that your cardboard shouldn’t be showing because I adjusted the dimensions of the fabric in this tutorial to fix that problem.)

Before closing the last seam

19. Tuck additional fabric into itself and slipstitch opening closed (or, if you hate slipstitching as much as I do, use your zipper foot again and sew really uber-close to the chipboard again.)

Closing the last seam

Your cover is now complete, except for inserting your Kindle.

20. Slide Kindle under the two strips of elastic. Close cover. Place flap over cover, Move elastic from back over flap to seal shut.

Finished product

You’ll notice that my flap looks a bit wonky–that it projects a bit instead of laying flat. I adjusted the measurement up in step 15 so that shouldn’t happen to you if you’re following this tutorial.


Of course, now that I’ve made my own case, I’ve seen a half dozen cute pictures and tutorials elsewhere that I’d ALSO like to try. You can check out my Kindle Cover Pinboard if you’re interested in seeing some of those.


Domestic pursuits

I walked into my craft room a few weeks back and just about laid down and died.

It’s. SO. messy.

Disaster zone messy. Can’t walk anywhere without tripping over something messy. “Were you born in a barn?” kind of messy.

It’s horrendous.

As I began to sort through the mess of fabric and notions and thrifted items and scrapbook paper and stuff salvaged from the recycle bin, I began to identify my problem: Too many ideas, not enough follow through.

I have half a dozen hundred (and that’s not much of an exaggeration there) projects in progress–or fabric and notions paired for a project that’s just in my brain.

I have a ginormous tub full of jeans ready to be made into a jean quilt. I have homespun flannels paired to be used in a braided rug. I have a teal matte velour for a skirt and a gorgeous lavender satin with a scalloped edge for a formal gown and bright green sateen for a Christmas dress. I have flannels already cut to size for receiving blankets, appliqued blocks ready to be pieced and quilted, crazy quilt blocks to be combined. I have bags of fancy fabrics for a crazy quilt of my own design, bags of old t-shirts for a throw quilt, old clothing articles waiting to be upcycled or used as a pattern.

The problem is that all these projects are in some state of UNDONE, and are filling my craft room past its capacity.

I decided that rather than try to reorganize my many ongoing projects ad nauseum, I would try to reduce the mess by completing some of the projects.

So I’ve been doing lots of little stuff around the house these days.

Repainting a thrifted file cabinet and sorting through my files (I still have to repaint the cabinet next to it–then I can empty the filing crate that’s hanging out in the middle of the office.)

Painted file cabinet

Finishing up a bath mat that I started ages ago. It’s made with old t-shirts gathered into ruffles and sewn onto a canvas matting. I had about five rows done and a whole scad of t-shirt strips pre-gathered. I just needed to get sewing.

Ruffled bath mat

Making a “Christmas” throw rug (easily washable for bathroom use) with the thrifted towels I’d bought for that purpose a couple of winters ago.

Christmas throw rug

Making a pillow cover from an old sweater (and a pillow form to go inside of it).

Pillow cover

Making the needed repairs to this lovely maxi so that I could wear it at last (I bought it in rather shabby condition.)

Blue polka-dot maxi dress

Altering this shift down a few sizes so that I could finally wear it. (Yes, I do buy vintage clothing that doesn’t quite fit if I think I can figure out how to make it fit.)

Vintage shift

Making a bag (using thrifted fabric) for the waffle blocks I’d bought at a thrift store a month or so ago.

Bag of waffle blocks

Finishing another row of quilting on a quilt I started three or four years ago (using old dresses and skirts!)

Quilting detail

Decoupaging 20 advertising magnets so that they don’t advertise anything anymore.

Decoupaged magnets

Except one, which advertises myself:

Decoupaged magnets
(Beyond the glare, that one reads “Bekah Bekah Bekah”)

Can you tell which patterns I liked best?

Decoupaged magnets

And I’ve made a new Kindle cover (for which I will someday put up a tutorial–I’ve taken the pictures and I have the steps written out–I just need to translate it into web-speak.)

Kindle Cover

Fully opened:
Kindle cover fully opened

Fully closed:
Kindle cover fully closed

Unfortunately, all this has barely made a dent in the disaster that is my craft room. I did, however, at least get my larger pieces of fabric in some semblance of order:

Fabric shelves
(Please pardon the blurriness of that photo).

And I pinned a few hundred additional craft ideas.

Of course.

:-)


Playing quilt designer

What with my brother and sister-in-law’s rushed wedding only two weeks after their engagement, we didn’t have time to prepare their wedding quilt in advance.

What’s more, unlike with my other sister-in-law, I didn’t really know enough about Kaytee’s taste to be able to choose a pattern and colors for her.

I figured we’d go with a log cabin design and that I’d let Kaytee pick which macro-design to use. What I wasn’t think about was how Kaytee, not being a quilter, would have a hard time visualizing the finished product from the schematics in the book I’d handed her–which meant that instead of looking at the schematics, she looked at the photos.

She fell in love with a particular design that, unfortunately, contained over 50 patchwork pieces per block and didn’t lend itself well to strip piecing.

My mom and I both looked over the pattern to see if we thought there was ANY possibility that we could do it–and we concluded that it was impossible.

So, I trotted off to the library to look through every quilting book and magazine there. I was looking for something similar to what she’d chosen–but that would simpler to put together.

I found a design and got to tweaking, working up a dozen different variations to present to Kaytee for a decision.

I tried a modified wedding ring design (made with square and rectangular patches instead of curved lines).

Quilt Variation 1

I adjusted it to have a slightly different colored border.

Quilt Variation 2

I set the blocks on point.

Quilt Variation 3

I tried one variation on a border.

Quilt Variation 4

I tried another variation on the border.

Quilt Variation 5

Now a completely different variation for the border.

Quilt Variation 6

What if I make the main body of the quilt a different color?

Quilt Variation 7

Or maybe if I put a sash between the main body of the quilt and the border?

Quilt Variation 8

On a whim, I went back to variation 5 and tried it with two different colors.

Quilt Variation 9

Ooo–I liked how that made the ring pattern pop. I tried the same technique on variation 6.

Quilt Variation 10

By now my juices were really flowing. What if I change the border so and adjust the rings so and…

Quilt Variation 11

I was on a roll, but I really needed to get off the computer and help Mom prepare for the party we were throwing to introduce Kaytee (sans John) to the family.

Right before the party got into full swing, I broke the bad news to Kaytee. We wouldn’t be able to do the quilt she’d originally picked out. She was disappointed until I brought her into Mom’s office to see the options we’d come up with.

It didn’t take her long to pick one–and not long afterwards, I was adjusting the colors to what Kaytee’d identified as her preferences.

Ta-da!

We have a plan. Mom and Kaytee will be shopping later today for blue and brown fabrics.

Quilt Variation 12

(I have a feeling this little pattern is going to become a new favorite of mine–I’m going to want to make a half dozen modified-double-wedding-ring quilts so that I can see how every variation looks in real life!)

So tell me, if someone offered you these options for a quilt, which would you choose? What colors would you go with?


Pinterest Picks and Pans: Kitchen Miracle Cleaner

If you’re on Pinterest, you’ve seen them, you’ve probably pinned them, and it’s quite possible you’ve never used them. They’re the household tips and tricks we ladies love to collect.

How do they do in real life?

Enter my reviews of Pinterest tricks I’ve seen and tried. Tricks like…

Kitchen Miracle Cleaner

The Link: One Good Thing By Jillee

The Trick: Mix baking soda and hydrogen peroxide into a paste and use it to clean just about anything

The Promise: Who can look at this before/after photo of Jillee’s jelly roll pan without frothing at the mouth?

The Attempt: I went to work on a loaf pan that’s seen better days. After 5 minutes of scrubbing, my pan definitely looks better (although nowhere near as nice as Jilly’s). But who has that kind of time to pretty up an already clean and functional pan that really doesn’t get shown to company that often? I don’t.

Pick or Pan? This may be a great trick for guck and grime on highly visible and hard to clean things (Jilly mentions using it on refrigerator handles), but it’s too much work with too little payoff to be used for cleaning everyday bakeware.


House Hunting and Self-Discovery

I’ve been sorta house hunting.

Not seriously. I mean, I haven’t gotten pre-approved for a loan yet, or figured out logistics or what-not. It’s still just theoretical. Not that I haven’t been thinking about it for a rather long time. But I’ve started looking at what’s available again.

Along the way, I’ve been learning all sorts of things about who I am and what I really want.

I started with an open mind–a very open mind–about what I wanted. I looked at anything within my general price range. I’ve learned that there are definite things that I want and don’t want.

Things I want:

  • A Yard
    I grew up on three-quarters of an acre. We had a garden, mature trees, and a lawn. I want those things. Desperately.
  • Central Air
    It’s funny because I’m not really a huge fan of air conditioning (except that I pretty much have to use it due to nasty allergies). But what I’m really, really not a fan of is not being able to see out of windows. Window A/C stinks.
  • A Dining Room
    There’s little that brings me more pleasure than having people over to eat what I’ve cooked. Sunday dinner isn’t complete unless there’s at least a half dozen around the table–but preferably a whole dozen. I think nothing of having twenty-five people over for a Seder. So, yeah, a dining room is pretty important–preferably one that can easily expand into another room for those really big dinner parties.

Things I want but shouldn’t have:

  • An Acreage in the Country
    I want chickens and a pig and a cow (or maybe I’d have to settle for a goat). I want to be a lady-homesteader. I’m also a single woman who works and is a homebody–and who would end up being a recluse if she owned an acreage in the country. Not to mention that I really don’t have the diligence to keep animals alive. Maybe if I was at home full-time and I had a family to force me out of hiding, it’d be another story. For now, no cigar.

Things I don’t want:

  • A New House
    Every house that I’ve spent extended time in that has been built in the past 35 or so years has been really shoddily built. What’s more, every house in my price range that has been built in the past 35 or so years looks shoddily built in the real estate pictures. Doesn’t inspire much confidence. And then there’s the fact that most new houses lack anything resembling charm.
  • A small house
    I’ve tried to be open to small. I need to be open to small. I’m a single woman buying her first home, for Pete’s sake. But I’m also a single woman who LOVES to just have a couple dozen people over for a Seder. Or host a dozen girls for a sleepover. I’m a single woman who wants to be able to have roommates–and still wants a spare room for visiting missionaries or kids up to run 5-Day Clubs. Not to mention that I’m a crafter AND a reader–both of which hobbies take up significant amounts of space (I probably have 300 yards of fabric in my craft room at present–and several thousand books in my library.) Small houses just aren’t exactly suited to my lifestyle.

Things I (still) couldn’t care less about:

  • School District
    Surprised you there, didn’t I? :-)
  • A master bathroom
    I don’t think I need a bathroom per bedroom. I’m going to be the homeowner and as long as there’s one working BATH, I’m good. For potential roommates’ sake, a shower would be nice. For general goodwill, it’d be nice to have a powder room in addition to the bathroom with a bath (I tend to take a while in the bathtub if I’m working on a good book). But I don’t need a master bath.
  • An Attached Garage
    I have grown rather fond of not having to scrape my windshields in the winter, but having an attached garage is not one of my priorities. Anyone who can’t handle a walk through the elements from house to car probably shouldn’t own a house anyway. Sheesh!

So there you are: what I’ve learned about my preferences thus far.


Tutorial: Anne’s Carpetbag

Remember the Anne-of-Green-Gables-inspired doll carpetbag I made (and gave away) earlier this month?

Finished bag

Wanna try to make one of your own?

It’s really quite simple.

First, print off the pattern. For best results, select “none” for page scaling.

Second, cut out the fabric.

For the outer fabric, I used a heavy upholstery fabric. If you want the bag without the “carpetbag” look, you could use any heavy-weight fabric. Alternately, you could use felt or felted wool (accidentally washed wool sweaters, maybe?) and leave it unlined.

  • 1 bottom piece
  • 2 front/back pieces
  • 2 side pieces

For the lining, I used a lightweight dress fabric. The fabric I used was pretty slippery–I’d recommend that beginning sewers try quilting cotton or broadcloth for lining. If you’re making a felt or felted wool bag, you can skip the lining.

  • 1 bottom piece
  • 2 front/back pieces
  • 2 side pieces

The contrasting handles leave the most up to you. I used a no-fray upholstery fabric that had an almost rubbery back. If you can find something similar, that’s ideal. Otherwise, you could try faux (or real) leather, canvas, or another heavy-weight fabric. If you use a fabric that won’t fray (and therefore won’t need to have it’s sides turned under), cut using the circle template I provided. If you’re using a fabric that will fray, make a circle template about a half inch wider (in diameter) to allow for turning the sides under before applying.

  • 4 circles
  • 2 strips 1 1/2 inches wide by 6 1/2 inches long

Third, assemble the main body of your bag (using the outer fabric).

Line up the bottom and the front (right sides together) and sew along bottom front seam.

Sewing bottom to front

Open up the seam.

Seam opened up

Now align the back piece with the other long side of the bottom piece (right sides together). Sew along the bottom back seam.

Sewing bottom to back

Press both seams open.

Fourth, put the sides on your bag

Align the side of the side piece with side of front piece (right sides together) and pin in place.

Aligning side piece

Now align the bottom of the side piece with the bottom piece (right sides together) and pin in place.

Aligning side piece 2

Finally, align the other side of the side piece with the side of the back piece (right sides together) and pin in place.

Aligning side piece 3

Sew along the pinned portions, making sharp turns in the corners by leaving the needle down, lifting up your sewing machine’s presser foot, and rotating your fabric 90 degrees. Make sure that the extra fabric from the front/back/bottom pieces isn’t in the way before you put the presser foot back down and begin sewing again.

Pivot turns

You’ve now got the first side on.

First side done

Repeat with the second side piece.

Putting on the second side

Fifth, stitch along the right side of all the seams you just made.

Finishing the seams

Notice how the stitching is right on the edge of the seam, going through both pieces of fabric on either side of the original seam. This gives the bag additional form and allows it to stand up on its own.

At this point, if you’re making an unlined bag from felt or felted wool, skip to step 8. If you’re making a lined bag, continue on with step 6.

Finished outer part

Sixth, repeat steps three and four with the lining fabric.

Finished lining

Seventh, attach the lining to the outside.

You’ll start by turning the outside wrong-side out and the lining right-side out. Slip the lining into the outside.

Lining up inside and out

Pin along the top edge of the lining and outside piece, lining up corners and the “dips” in the sides.

Pinning in the lining

Sew along the top of the bag, leaving a small section along the back piece unsewn (so that you can turn the bag inside out.)

Pinning in the lining

A small unsewn section

Turn the bag inside out through the small hole you left between the lining and the outer portion of the bag.

Topstitch along the seam around the top of the bag, closing the opening as you go.

Topstitching

Ninth (and finally), make and attach the straps.

Iron a fold into the long sides of the strap fabric.

Ironing folds in the straps

Now fold the straps in half longwise so that you have a long narrow strip with the previously folded edges on one side (it’ll look like double-folded bias tape). Sew along the edge.

If your circle fabric has the potential to fray, iron under the edges approximately 1/4 inch.

Now pin your straps to the sides of the bag as shown below.

Pinning on straps

Layer the circles on top of the edges of the straps and pin.

Circles over straps

Now, you’ll stitch around the edge of the circle, securing the straps and the circle to the bag. I made a little “X” through my circles to further secure the strap.

Finished bag

Congratulations, your Anne-inspired carpetbag is now complete!