Eating RED meat

Many in my family are of the mistaken notion that I only consume “fully dead” meat products.

They complain that I like my steak so dead that it has no flavor left.

I tell them that it’s not that I like my meat overcooked–it’s that I like to make sure that my meat is safe. Then I urge them to buy a instant-read food thermometer.

Why?

Because with an instant-read food thermometer, you can tell within moments that your meat is safe to eat and don’t have to rely on remarkably unreliable data about doneness–data like how pink a piece of meat is.

Last night, after my dad purchased an instant-read food thermometer, I ate a delicious steak that was cooked to an appropriate internal temperature of 150 degrees Fahrenheit (Whole cuts of beef and pork are considered safe if they reach an internal temperature of 145 degrees for at least 15 seconds.)

Steak cooked to 150

See that?

Note the blood pooling on my plate?

That’s a safely cooked steak. I know because I temped it personally.

I also know that my dad pulled another steak off the grill, even though my internal temperature readings were only 140 degrees. He was sure the steak was done, that the thermometer was wrong.

Once he got inside and cut that steak open, he decided differently. The thermometer was right, the steak wasn’t fully cooked.

His options now? Eat it in its potentially dangerous present state or nuke the life out of it.

He chose to eat it as it was. I would have nuked the life out of it.

But that decision could have been avoided if he’d just trusted his thermometer.

Food thermometers–making RED meat safe for everyone!


For those who are interested in how to use an instant-read food thermometer, you’ll want to insert the probe at least an inch into the side of your piece of meat at the thickest point. Wait until the temperature on the dial stops increasing.

While many thermometers have temperature recommendations listed on them, these recommendations are not safety recommendations but preference-based recommendations. Often, the temperature listed on the thermometer is higher than the safe temperature. Instead of going with these recommendations, I prefer to know the safe numbers and to cook my meats to my own preferred level of doneness once I know they’ve reached a safe temperature.

So, without further ado, I offer you a handy table of safe meat temperatures.

Beef or pork steaks or chops 145 for 15 seconds
Beef or pork roasts 145 for 3 minutes
Ground beef or pork 155 for 15 seconds
Poultry, whether whole or ground 165 for 15 seconds
Leftovers or other reheated foods 165 for 15 seconds

Wardrobe mods

Once or twice a year, Kris has a garage sale to raise money for missions. She accepts donated items from all over everywhere to sell.

And when Kris gives the call for donations, I know it’s time to get sorting through my stuff.

What with a new job to dress professionally for, my wardrobe could use a going over anyway.

So a few days ago, I took to sorting through my drawers and closet. Pull out everything that doesn’t fit, needs mending, or that I just don’t wear. Critically evaluate each item and sort into three piles: garage sale, rag material, and mend or refashion.

Inspired by Marisa of New Dress a Day and by the hundreds of t-shirt refashioning tutorials I’ve seen in the past several months, I was more ruthless than usual when I sorted my first bit.

I pulled out dozens of shirts, dresses, slacks, and skirts that are perfectly fine and wearable–and that I do wear–but which I’d like even more if they were modified. Short sleeves instead of long. A little tailoring here and there. Redo the hem to a more flattering length. Bits and pieces.

And I started to get to work.

A plain black high-necked, long-sleeved t-shirt became this fun shirt:

Black T-shirtBlack T-shirt

When I accidentally put the shirt on backwards (with me, an unfortunately way too common occurrence), I discovered a happy surprise. The shirt works just as well backwards with a ruffly scoop back and a boat-like front neckline.

Black T-shirtBlack T-shirt

Sorry, ladies, I’m keeping this one for myself–but I sent plenty of other clothes out to Kris’s. If you’re in Lincoln this Thursday and Friday, be sure to drop by 4800 NW 2nd Street to peruse the offerings and support missions. (This particular sale will support missionaries who work with indigenous populations in Asia, teaching “storying”–a means of teaching the Bible to illiterate or otherwise non-reading people.)

Who knows, maybe you’ll find something to “mod” yourself!


Tuesday Night (A Pear-Sauce Tutorial)

Dad has a coworker who has a pear tree–and she offers Mom the pears every year.

This year, Mom had plenty of pears already, so she didn’t need anymore.

But our family never refuses free food :-) and Mom and Dad would rather the coworker (who is an older woman) NOT being trying to climb the tree. So they went and picked the tree for her. They ended up with two boxes of pears–some little and some big.

Pears in a box

Mom figured one of the kids would be pleased to take the extra pears off her hands.

And one–well actually two–of us were.

Daniel got the big ones to can as halves or slices. I took the little ones to make pear-sauce with. (Debbie was right yesterday!)

Never heard of pear-sauce? Just think applesauce only with pears.

To make pear-sauce, you first need to rinse off all your pears.

Pears in sink of water

You’ll want to cut each pear in half. Remove any worm holes or bruised spots. There’s no need to peel, or core, or even stem these.

Pears in stockpot

Stick all of your pears in a big stockpot or something similar, add some water, and heat it all up. You’ll want to heat it until the pears are all nice and soft.

Pears on stove

Now, you’ll need to get out your “squitter”–more technically known as a sauce maker or food strainer. These are not the most common of kitchen appliances, but they come in handy if you plan on doing any amount of home canning. My family makes large quantities of applesauce and tomato juice using our “squitter”. A “squitter” can also come in handy if you’ve got babies and want to make your own baby food to freeze.

Pears in squitter

Dump your hot pears into the top basket of the squitter (I used a slotted spoon to transfer the pears so I wouldn’t get a whole lot of extra liquid in the sauce.) Then turn the crank. You can see that the pulpy parts of the pear come out one spout while sauce comes out the other. Continue cranking and refilling as necessary until your sauce is done.

Pears in squitter

Now you’re ready to fill the jars. Use a canning funnel if you have one and fill your canning jars to within 1/2 inch of the top. Run a spatula or knife along the inside of the jar to remove any air bubbles. Then wipe the upper rim of the jar, place a new canning lid on top, and screw a ring on to hold it tight.

Filling jars with pear-sauce

Now, you’re ready to process your pear-sauce. You can process it in a boiling water bath for 20 minutes–or you can go the easy way out :-) and pressure process it for five minutes at five pounds pressure.

16 pints of pear sauce

Now you can eat sugar-free, preservative-free pear-sauce any time you want!

(I like to mix mine with plain yogurt and eat it for breakfast.)


Tutorial: Produce Bags

I like to pretend I’m eco-friendly and I do what I can to reduce waste (I hate to throw things away–I’d much rather just not bring them into my house in the first place.)

Several years ago, I made myself some fantastic canvas grocery bags, and I use them faithfully whenever I go shopping–but I still found myself bringing home way too many plastic bags.

Why? Because I still had to use those little produce bags for my produce and my purchases from the bulk bins. Never mind that the first thing I do when I get them home is transfer everything from the bags to bowls or storage containers–I still end up with all those little bags in my house. What’s more, these bags are doubly annoying because they can’t really be reused (except in a really tiny trashcan.)

I’ve seen half a dozen hundred little tutorials for produce bags online–and have quite a few of them bookmarked. But then, rather than using one of those, I just whipped up a modified version of my own in an afternoon. (I was able to make a dozen bags in under 2 hours using this technique.)

Several produce bags full of stuff

Here’s how I did it:

Step 1: Select fabric

I used a sheer fabric that I already had on hand–and an old sheer curtain. You could also use netting or tulle (tulle can be purchased very inexpensively.)

Step 2: Cut to appropriate size

There are a few options for cutting.

  1. You can cut two rectangles approximately the size of your finished bag (so for a 12″ wide by 15″ long bag, you would need two pieces of fabric approximately 12″ by 15″)
  2. You can cut one rectangle so that the “fold” will be along a side of the bag (so for a 12″ wide by 15″ long bag, you would need one rectangle 15″ long and 24″ wide)
  3. You can cut one rectangle so that the “fold” will be along the bottom of the bag (so for a 12″ wide by 15″ long bag, you would need one rectangle 30″ long and 12″ wide)

I used all three of these methods at different times in order to best use the fabric lengths I had. You can, of course, adjust the dimensions to make bags of different sizes.

Cutting sheer fabric for produce bag

Step 3: Overlock stitch a two inch length in the top corner of your fabric.

Stitching produce bags

I have prepared a little diagram that shows where to stitch (in red) based on the cutting method you chose in step 2.

Stitching diagram

Step 4: Sew side and bottom seams.

Now you will want to align your already stitched edges so that they overlap, with the right side of the fabric together.

Stitched edges aligned

The following diagram shows where folds should take place with each cutting method (folds are indicated by dotted lines and arrows).

Folding diagram

Now you will want to sew together the sides and/or bottom using overlock stitch. The sides you will stitch are indicated using blue in the diagram above. (Note that you will not restitch over the area stitched in the previous step.)

Step 5: Fold down top casing and press.

You should fold down approximately one inch (or one half of the approximately two inch length you stitched in Step 3) of fabric and press it into place

Pressed casing

Step 6: Sew casing down along bottom edge using overlock stitch.

Casing sewn down

You can see how this leaves a nice casing with a finished edge at a corner.

Step 7: Turn bag inside out and thread ribbon through casing.

Completed produce bag

I used leftover ribbon from my brother and sister-in-law’s wedding. You can use ribbon, twine, yarn, whatever you’ve got. Tie or sew ribbon together at the end to make a loop and you’re done!

The finished result:

Produce bag on grocery scale

It’s difficult to see, but I weighed this bag at my grocery store to see if it would be adding too much weight to my produce or bulk purchases. This bag weighed .02 lbs. I don’t think I’m too concerned! (Of course, if you used string or lighter weight ribbon, you could probably reduce that weight.)


Bed Tales

Every morning, before I do anything else, I fix my bed.

Every morning except Tuesday, that is. On Tuesday mornings, I wake up and immediately strip my bed, sorting its linens along with the rest of my laundry to be washed. My bedding will be washed in hot water and dried in order to rid it of any allergens–then I’ll fold it and place it at the bottom of my rotation of four sheet sets in the linen closet.

While my laundry is going, I pull the top sheet set off the rotation in the linen closet and remake my bed, allergen free.

Newly made bed

Every evening, I bathe or shower before going to bed, removing any allergens I’ve collected throughout the day, lest I transfer them to my bedding.

Every day except possibly Monday. If I am exhausted on a Monday night and don’t have the energy to bathe, I excuse myself and go to sleep with the yuck of the day still on. After all, I’m going to clean my sheets the next day–the only suffering I’ll experience will be in that one night.

But what am I to do when I finish a long telephone conversation with my sister rather late on a Tuesday night? My sheets are completely clean–they have not even collected any sloughed off skin, much less any pollen or dust from my every day life. Yet I am exhausted. The thought of trying to manage a bath or shower is overwhelming.

I can’t abide dirtying my brand new made bed.

I sleep on the futon and the cleanliness of my bed linens is preserved another day.

Slept in futon


In a Crafty Mood

If you’ve known me for any length of time, you probably know that one of my favorite hobbies is homemaking.

I love to cook, to organize, to sew, to quilt, to do all sorts of crafty stuff.

And since I got done with the semester a couple of weeks ago, I’ve been in crafty overdrive.

I’d become dissatisfied with a scarf I made a couple of years ago, so I unraveled it and re-crocheted it in a more pleasing open-work style.

Crocheted Scarf

I finished a quilted Christmas tree skirt that I’ve been working on since January or February.

Christmas tree skirt

I made a nightgown while adjusting a pattern for a dress.

Nightgown

I made great progress on the aforementioned dress (I only still have to hem it–and make the sash and handbag that goes with it.)

Dress

I whipped up a (very) last-minute quilt for my cousin who is expecting and had a shower on Saturday.

Baby quilt

I finished a Christmas tree ornament.

Star Ornament

I cut out all the applique pieces for and prepped the first of my day-of-the-week tea towels.

Monday tea towle

And, of course, Joanna and I finished up Daniel and Debbie’s wedding quilt (pictures to come after they’re married–in less than a month!)

I’ll say it’s been a pretty productive two weeks.

(Especially considering that I actually HAVE made good progress on my thesis as well.)


The Savvy Seamstress

The savvy seamstress knows the power of a mock-up.

Imagine trying to make a dress out of this lovely fabric

Pattern and Fabric

to fit on this (lovely but unconventionally sized) body.

Me

Let’s just say that the pattern rarely fits.

So a savvy seamstress makes a muslin mock-up. That way, she can discover that she needs to use a size 16 front bodice piece and a size 8 back bodice piece, for example, without making any expensive mistakes on her pretty fabric.

Of course, a really savvy seamstress hates to waste a good muslin bodice that now fits quite well.

So sometimes she whips the muslin into a little something she can wear in real life too. Like this fun little nightgown.

Homemade Nightgown

Not to toot my own horn, or anything.

**I have not even cut out the dress fabric yet. However, thanks to today’s work, I now know which sizes to cut and am thoroughly familiar with how the bodice is put together. I hope to complete the dress sometime next week.**


Thursday starts…

For me, Thursday starts on Wednesday night when I gather everything that I need for the next day, bathe, and pack myself into bed (hopefully not too late.)

Thursday is my “long day”–so named because I’m gone from 7 to 6. Certainly, it’s not the longest day I’ve ever had–one semester, I did two 14 hour days every week–but it’s long enough that I need to be prepared ahead of time.

So every Wednesday night, I put together my Thursday stuff.

Thursday stuff

Clothes and shoes set out, down to jewelry? Check. (I’ll add my glasses as soon as I take them off this evening.)

Bag of books, including graded papers to be returned and lab manual? Check.

Anything extra needed for lab? Check. (This week it’s returning the flour, salt, pastry dowels, and pastry blender I used to make pie crust–and, of course, bringing along the pie crusts I made for demonstration.)

Necessities for afternoon office hours and class? Check. (This week I’m not meeting with my dad for lunch, so I’ll have a spare hour to run home and grab the text and extra tests I’ll be administering during office hours. Usually, I’m a bag lady carting half a dozen bags around campus.)

Computer off. That’s the tricky part.

I’ve got to actually get off the computer and get to bed if I really want to have a successful Thursday.

So, as Thursday starts for me, I bid you good night.


Evidence that Spring Really Has Sprung

Tuesday is my laundry day. I generally end up with two loads–sometimes three. A load of whites, a load of blacks, and depending on how cheery I was that week, a load of colors. Usually, though, I end up throwing the couple of colors in with the blacks and calling it good.

Not this week.

Spring is finally here–and with it, a transition in my laundry routine.

laundry baskets

Note the SINGLE pair of black pants. That’s the ONLY black item in this week’s wash.

Really.

Spring has sprung–and oh am I glad to see it!


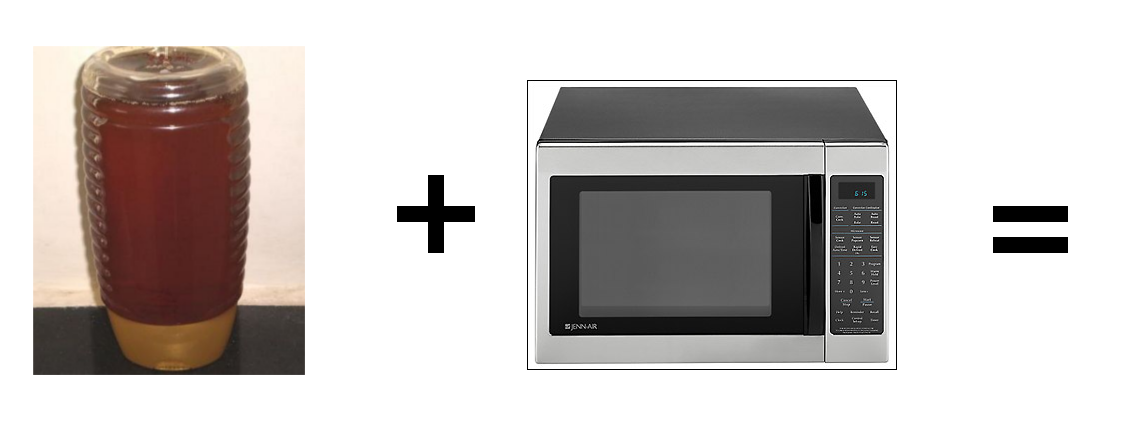
Kids, I blew up the honey

There was a little over a tablespoon worth of honey in the honey bottle–just enough for my peanut butter and honey sandwich. The problem was, it was solid.

So I stuck the bottle in the microwave and, too lazy to push the buttons for just a couple of seconds, pushed the “minute plus” button.

Then, too industrious to do nothing while in the kitchen, I started emptying the dish drainer.

About 45 seconds later, I heard an enormous “POP!”

The lid had been blown off the now shriveled honey bottle and a thin layer of honey evenly coated all six internal surfaces of the microwave.

Well, at least the microwave got cleaned today.