Vacuuming was on my list of household chores to get done today–but my vacuum didn’t seem to be working properly.
My first thought was to check the beater. It often gets clogged with a combination of hair and thread (that’s what I get for being a quilter with long hair.) Sure enough, I was able to extricate a handful of fibers from the beaters.
Unfortunately, this wasn’t enough to get the vacuum working. So I checked the next item on my troubleshooting list: the bag. The bag was STUFFED–so much so that dust and gunk was backing up into the hose. Gross!
That’s what I get for relying on the “change bag” light on the front of the vacuum.
I took the bag outside to empty it–and ended up ripping the bag. It’s a disposable bag, but I’ve already emptied and reused it several times. I was kinda hoping to keep using it indefinitely. But no such luck.

Of course, I didn’t have a replacement bag handy–why would I if I wasn’t ever planning on needing it? So, rather than running to the store (I’m putting off getting gas until tomorrow and I never like to get too far below a quarter tank), I made myself a new bag.
It’s simple really.
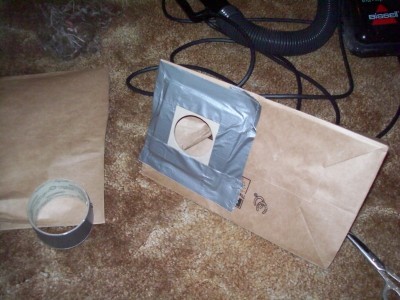
Just grab a paper bag, cut the top off and fold and duct tape the remaining top together.

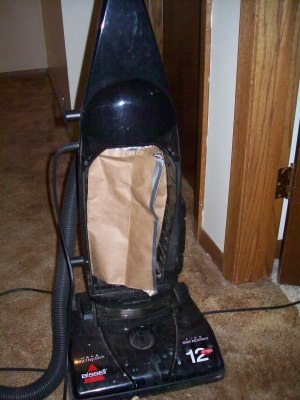
Now that you’ve got a bag approximately the size of a vacuum cleaner bag, cut an x on the bottom of the bag approximately the size of the vacuum cleaner’s hose inlet. Pull the cardboard square off the old bag, duct tape it over your x, and attach the hose inlet.
Walla!

My newly refashioned vacuum cleaner works great!

I am amazed at your creativity once again