Worship While You Work

Women are said to be master multi-taskers. And for my part, I believe it.

We all know at least one mother who somehow manages to make lunch, do the breakfast dishes, carry on a conversation with her pre-teen, help her teen with geometry homework, and supervise her youngster’s piano practice, all while compiling a mental grocery list.

I don’t have those kind of skills.

But I do like to multi-task whenever possible (even if my multitasking is generally on the line of 2-4 tasks rather than half a dozen or more.)

One of my favorite ways to “multi-task” is to worship while I work. You’ve heard the ditty “Whistle while you work…” which advises you to whistle while you work because “it won’t take long when there’s a song to help you set the pace.” I don’t whistle while I work to make my work go more quickly, I worship while I work to keep my focus on Christ instead of on all the other things that housework generally makes me focus on.

You know what kinds of things I’m talking about…
…frustration at always ending up with an odd sock (or worse, a half dozen odd socks, all from different pairs)
…anger at SOMEONE for tracking mud across the carpet
…self-pity because I’m the ONLY one who ever does the dishes
And lots more.

If I let it, housework can get me into a high dudgeon. So I don’t. I don’t let it, that is. Instead, I worship while I work.

I keep a hymnal in my kitchen. I open it up and set it in a corner of my counter. Then I sing hymns as I stir my sauce, knead my bread, or mop my floor.

I turn on worship music on my computer as I fold my laundry or tidy my bedroom.

I pray or sing “freestyle” as I wash dishes or vacuum the carpet.

It’s a little thing. Maybe even a silly thing. But worshipping while I work helps me keep my mind on who I’m working for.

“And whatever you do, do it heartily, as to the Lord and not to men.” Colossians 3:23


Retro Mod

Since my earliest childhood, black has played an integral role in my wardrobe identity–or so I’m told. My mom tells me she used to always want to put me into pastels, and I’d gravitate instead to deep, dark, or bright colors–even the dreaded black. Mom tells the story now as a testimony to the “Color Me Beautiful” seasonality approach to colors. I’m a winter, there’s no doubt about it–and even as a child, I knew what I looked best in.

Black is the base color in my wardrobe. I own no less than 6 black dresses, 1 black suit, and 5 pairs each of black slacks and black skirts. And that’s not counting the outfits in which black plays a role but is not the primary color.

So it’s not as though I need another black dress–another black anything, for that matter.

But I couldn’t resist the lure of the black dress that has been sitting at the bottom of my mending basket since my grandma passed it down to me years ago (maybe 6 or 10 years back?)

It was a simple dress, a mid-calf a-line style with short sleeves. It fit me well enough, except for the sleeves, which constrained my movement too much. I’d torn the sleeve off the last time I tried the dress on, and the dress had been in my mending basket since. I planned to take off both sleeves and simply finish off the armholes for a sleeveless dress.

Meanwhile, I acquired black dresses by droves, including a mid-calf a-line style dress with short sleeves, which made the dress in my mending basket superfluous.

But it fit so well, and I liked the style, and it used to belong to my (now-deceased) grandma. My frugal and romantic and black-dress-loving nature rebelled against giving the dress up.

So I tried it on and developed a plan. I removed the other sleeve and finished both armholes with black bias tape (left over from a quilting project). I finished the neckline with the same tape for continuity. I chopped off the bottom half of the skirt and hemmed the rest to just above the knee. I bought some white rick-rack and sewed it along either side of the center seam.

Retro-Mod Black Dress

My dilemma solved, I tried on my new-from-old black dress. Absolutely retro-mod. I love it!


Grocery Shopping Experiment

“Never shop on an empty stomach.” Or so the saying goes.

Penny-pinchers say you’ll spend more than you want to. Dietitians warn that your food choices might be less than stellar. I would add that you might spend more time in the store than intended.

It was supposed to be a quick trip to the store. I’d been running errands all afternoon–and then I popped in to the gym for a (relatively) quick bike ride (Yay for starting to train for the big ride!) By now I was tired and hungry and just wanted to get home–but I had my little list that I really wanted to get taken care of while I was out and about.

My list?

  • Fresh fruit
  • Lettuce
  • Celery

My purchases?

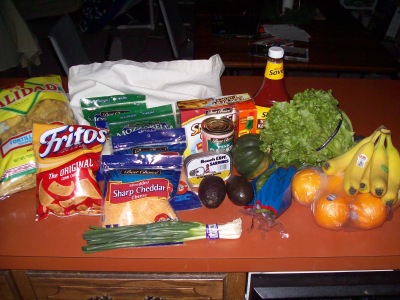
See for yourself.

Grocery store purchases

  • Bananas
  • Apples
  • Oranges
  • Celery
  • Lettuce
    AND
  • Green onions
  • Acorn squash
  • Avocados
  • 2 bags of cheddar cheese (on sale)
  • 2 bags of mozzarella cheese (ditto)
  • A bag of tortilla chips
  • A bag of Fritos
  • A tin of sardines in mustard sauce
  • A can of salmon
  • A bottle of Tabasco sauce
  • A bottle of ketchup
  • A box of mozzarella cheese stick snacks

The results of this little experiment?

Cost of shopping trip
Items on list cost $4.93
Items not on list cost $21.12
I quintupled the cost of my shopping trip by shopping on a empty stomach! Yikes!

Food choices
A number of my impulse purchases were of high nutritional quality (but then again, I’m a dietitian who happens to adore food). But then I still did make some purchases that I never make when I’m exercising self-control and wise shopping practices. Case in point? Frozen mozzarella stick snacks. I never even VISIT the processed freezer food section of the store. But today I thought, “You know, I would love to have some mozzarella sticks”–and since I was in the store, I just went ahead and got them. Then there’s the Fritos–which ostensibly were for with the chili I was going to warm up when I got home. But I opened the Fritos and started digging in before I was even out of the grocery store parking lot. Um, yeah.

Time
I didn’t calculate this exactly, but I’m pretty sure I picked up the items on my list in less than 5 minutes. My overall shopping trip took over 20. And, if it hadn’t have been for all those extra impulse purchases, I could have paid with the cash in my purse (instead of having to run out to the car to get my bank card, which I’d left in my gym bag.)

Based on my experiment, I have decided that “they” are right. It’s best to not go grocery shopping on an empty stomach.


A Tailoring Trick

A couple of weeks ago, I was horrified to realize that none of my clothes fit. And by none, I truly mean NONE.

You see, I just so happen to be blessed with an ample top and a practically non-existent bottom, with long arms, legs, and torso. Which means that I can rarely find something that fits off the rack.

Even brand new, my shirts tend to strain across the front, barely cover my belly, and unintentionally become three-quarter length sleeves. I’ve dealt with it for years by wearing wife-beaters under most of my tops.

Brand new slacks tend to be too short, and have big bags where most people’s hips and behinds go. I solve half the problem by buying slacks with cuffs–and then taking down the cuffs for extra length.

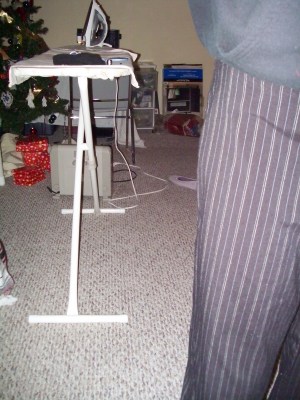
Altering pants
Note the “bags” in the hips.

But I lost some weight last year, leaving me with even more fitting problems. Now my slacks and skirts slip right off my waist–in addition to bulging around my hips.

I refrained from altering my clothes, except for adding belt loops to a few pairs of slacks, because I felt sure that I would regain the weight. After all, I’d maintained that weight for years–why would I develop a new set point?

But maintain a new set point I have–and now I have decided that it’s time my clothes fit properly.

So I loaded my machine with black thread, pulled all the black garments out of my closet, and got to business–and quickly remembered why I don’t like to do this too often.

Tailoring is a laborious process of trying on, making adjustments, trying on again, adjusting some more, ripping out seams, redoing seams. It takes forever, and it’s pretty imprecise.

I had just decided that maybe I’d only do one pair of slacks this evening when an idea hit me. What if–instead of trying on the slacks, guestimating what needs to be altered here and there, trying it out, trying it on, and repeating the process until perfect–what if I just put my slacks on inside out and pinned everything up. Then I could just sew along my pin line and call it good.

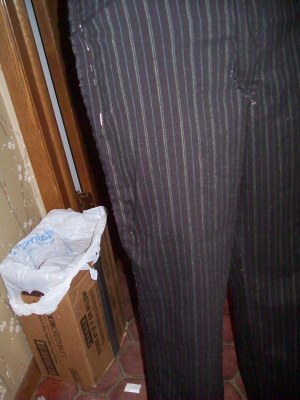
Altering pants
Pinning up those hip “bags”.

Amazingly, it worked. I kept going and ended up getting 3 skirts, 3 pairs of slacks, and 1 dress altered this evening–much more than I had expected.

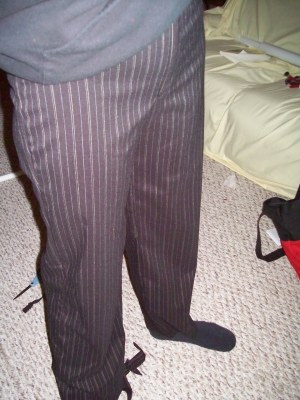
Altering pants
Pants that fit. Amazing!

So, next time you’re frustrated at the fit of your clothing, try the little trick I learned this evening–turn your pants inside out.


Making do

Vacuuming was on my list of household chores to get done today–but my vacuum didn’t seem to be working properly.

My first thought was to check the beater. It often gets clogged with a combination of hair and thread (that’s what I get for being a quilter with long hair.) Sure enough, I was able to extricate a handful of fibers from the beaters.

Unfortunately, this wasn’t enough to get the vacuum working. So I checked the next item on my troubleshooting list: the bag. The bag was STUFFED–so much so that dust and gunk was backing up into the hose. Gross!

That’s what I get for relying on the “change bag” light on the front of the vacuum.

I took the bag outside to empty it–and ended up ripping the bag. It’s a disposable bag, but I’ve already emptied and reused it several times. I was kinda hoping to keep using it indefinitely. But no such luck.

Torn vacuum cleaner bag

Of course, I didn’t have a replacement bag handy–why would I if I wasn’t ever planning on needing it? So, rather than running to the store (I’m putting off getting gas until tomorrow and I never like to get too far below a quarter tank), I made myself a new bag.

It’s simple really.

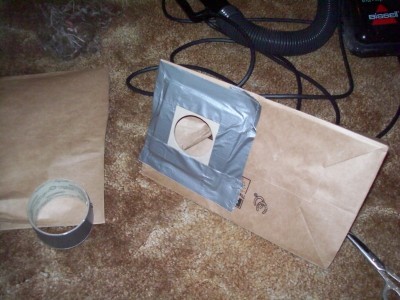
Just grab a paper bag, cut the top off and fold and duct tape the remaining top together.

Homemade vacuum cleaner bag

Now that you’ve got a bag approximately the size of a vacuum cleaner bag, cut an x on the bottom of the bag approximately the size of the vacuum cleaner’s hose inlet. Pull the cardboard square off the old bag, duct tape it over your x, and attach the hose inlet.

Walla!

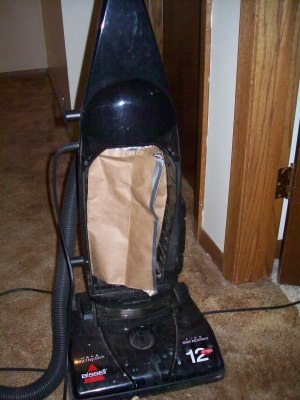
Vacuum cleaner with new bag

My newly refashioned vacuum cleaner works great!


Thankful Thursdays: Small Advances

Today I’m thankful for the small advances, the little things that indicate I’m closer to finished than I was a week ago.

  • My bathroom is clean, truly clean, for the first time in months. I cleaned the mirrors! And the floor! And got out the big guns for the bathtub and toilet. It feels nice, really nice.
    clean bathroom
  • My room is tidy, or at least almost tidy. That is, the only stacks are books–no papers, laundry, reusable shopping bags, trash, or stuff that belongs elsewhere.
    Clean Bedroom
  • The dishes are done–for now. I’ve been Susie Homemaker lately–but I do the dishes just as I’m dirtying more. This time, my counter-top is clear. Well, clear until I have dinner tonight (turkey-corn chowder, yum!)
    Clean Counter-top
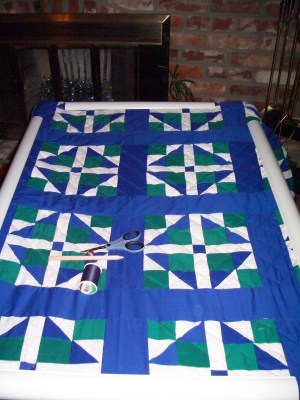
  • My quilt is almost half done. I enjoyed several hours of good quilting time this morning–and made considerable progress.
    Quilt Progress
  • I’ve had a call back on my job application. Unfortunately, she called while I was driving at the very end of the workday. So, I didn’t end up talking to the HR person–but she wants me to call her back tomorrow. That certainly sounds promising.
  • I’ve got some leads for my continued genealogy search. Since I started doing family history, I’ve had a big blank spot for my Grandma Menter’s family. I knew that her maiden name was Williams and that her mother’s name was Clara. Not exactly the most promising information. But Dad dug out some boxes for me to look through on Sunday–and I found out that Clara’s maiden name was Washburn and that she had a brother named Frank and a sister named Minnie. I also learned that my great-grandfather (Clara’s husband) was named Albert H and had a brother named Walter. Definitely the best leads I’ve had in genealogy for a while.

And I’m thankful that God is always at work around me, developing my character to match the assignment He has for me: that I might be perfect, lacking nothing, and that I might have hope.

“My brethren, count it all joy when you fall into various trials, knowing that the testing of your faith produces patience. But let patience have its perfect work, that you may be perfect and complete, lacking nothing.” (James 1:2-5)

“And not only that, but we also glory in tribulations, knowing that tribulation produces perseverance; and perseverance, character; and character, hope. Now hope does not disappoint, because the love of God has been poured out in our hearts by the Holy Spirit who was given to us.” (Romans 5:3-5)


Bean Porridge Hot

Laura Ingalls Wilder writes of playing “Bean porridge hot” with her sister in The Little House on the Prairie. She says that the song was true. “No supper was so good as the thick bean porridge, flavored with a small bit of salt pork, that Ma dipped onto the tin plates when Pa had come home cold and tired from his hunting. Laura liked it hot, and she liked it cold, and it was always good as long as it lasted. But it never really lasted nine days. They ate it up before that.”

Soups are like that, I find, which is one of the reasons I love soup so much. A good soup or stew recipe is good the first time, and good the second time, and stays good all the way to the last drop.

I’ve recently found a winner in the Better Homes and Gardens New Flavors from your Crockery Cooker Cookbook.

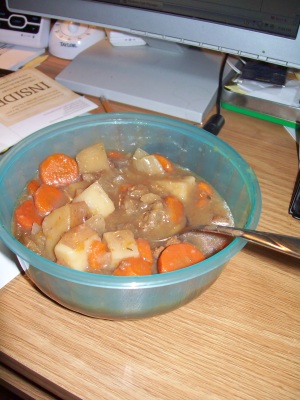
Beef Cider Stew

This Beef Cider Stew was good when I tasted it the day I made it, good when I had a bowl a day later, and is still good on the fifth day. I doubt I’ll make it to 9 days. Give this fantastic recipe a try!

Beef Cider Stew

Ingredients:

  • 1 lb beef stew meat, cut into 1 inch cubes
  • 1 Tbsp cooking oil
  • 4 carrots or parsnips, sliced
  • 2 medium red-skinned potatoes, cut into chunks
  • 2 onions, halved and sliced
  • 2 apples, cored and cut into chunks
  • 2 stalks celery, chopped
  • 2 Tbsp cook cooking tapioca
  • 1 cup apple cider
  • 1 cup water
  • 2 tsp instant beef bouillon
  • ¼ tsp dried thyme
  • ¼ tsp pepper

Instructions:

  1. Brown meat in hot oil.
  2. Place all vegetables in crockpot. Sprinkle tapioca over top. Add meat. Combine cider, water, and spices and pour over meat.
  3. Cover and cook on low for 8-10 hours or on high for 4-5 hours.

For my own part, I rearranged the instructions a bit. I prepped all my vegetables in the crockpot the night before and moved my precut stew meat from the freezer to the fridge. That way, all I had to do before I left for work in the morning was brown the meat and dump it and the cider/water/spice mix over the top of the veggies (and turn the crockpot on, of course). Easy as pie–and just about as delicious!

What about you? Do you have a favorite soup or stew recipe that you can eat hot, cold, or many days old?


Quilting to Resume…

It’s been six months since we had weekly quilting circle at the ABC’s–but the break ends soon! Starting tomorrow, we will be resuming quilting at the ABC’s every Sunday afternoon from 3-5 (Note the earlier time–and realize that AB&C will need to leave for Life Group at 5 on the dot.)

We’re all beginners (most of the ladies are working on their first quilt) so don’t feel shy if you’ve never quilted before. Each of us is working on our own project, but we’re willing to help you get started on a project of your own (whether it be a potholder, a table runner, or a full sized quilt.) We have all the tools you need (unless you want to make sure the fabric matches your color scheme), so come right on.

Here’s a sample of what I’ve done over the past couple of years:

My quilt

My quilt top

Olivia's baby quilt

Nytejok's baby's quilt

Nyayan's baby's quilt

Hannah's baby quilt

My sister Grace completed this one at last year’s quilting circle:

Grace's quilt

If you’re in the city of Lincoln and would like to attend but don’t know my address, e-mail me or give me a call and we can work something out.


The perfect study break

Finals generally mean hardcore studying, sitting at my desk poring over a combination of computerized and printed material. They mean spending hours at a stretch on schoolwork, as opposed to my usual 30-45 minute bursts.

But the brain (and the bottom) grows dull with prolonged sitting, and study breaks are in order.

My favorite study break?

Cleaning.

Unlike studying, cleaning involves getting up and moving around. Unlike studying, cleaning gives instantly visible results. And best of all–I don’t generally get sucked into cleaning and rendered useless by it (as I would by other common study avoiding activities such as Facebook, web-surfing, blog reading, computer game playing, novel reading, and the like.

So, thanks to a Food Chemistry test tomorrow, my dresser and desk surfaces are decluttered, organized, and dusted. And thanks to the research manuscript from a couple of weeks ago, my bathtub got a thorough scrubbing.

It feels nice to know, that even if I didn’t study well enough to get a good grade on my final, at least I’ll come home to a clean(er) house!


This meal brought to you by the letter P

I felt like cooking this evening–or more specifically like eating a hot, real meal this evening. And since my roommate (who doesn’t eat pork) is out of town, I made myself some pork.

I added a twice-baked potato that has been sitting in the freezer for a while–and some peas, which I absolutely love. Then the spirit struck me and I decided to whip up some instant pistachio pudding to go with it all.

It wasn’t until I’d finished reheating the potato and peas, whipping the pistachio pudding, and pan-frying the pork that I realized I was eating all p‘s. Pork. Potato. Peas. Pistachio Pudding.

Introducing, dinner. Brought to you by the letter P.

Plate of pork, potato, peas, and pistachio pudding

A quick note on pork: When I was young, I thought I didn’t like pork. After all, I was used to dry pork chops that required half a cup of applesauce per bite to make them palatable. (Not a bash on my mom’s cooking–she really is an excellent cook. It’s just the pork chops.) But then Mom started buying these picnic roasts–and I loved them. They were moist, tender, flavorful. They were great. Okay, so it wasn’t all pork that I disliked. Just chops. Then I discovered the quick read food thermometer. This is honestly the best kitchen tool since the electric carving knife (bread slicer, that is). I cook the meat to an internal temp of 155 F–and it’s moist and tender and has great flavor. Amazing, isn’t it? If you’ve never owned a kitchen thermometer, go get one. It’s pretty much the best thing you can do. Now you don’t have to burn your meat to a crisp to make sure that it’s done. Just check the internal temp real quick and pull it off the heat while it’s still good.

And just for the record, the internal temps for foods are as follows:

165 F Poultry, stuffing, stuffed dishes (with meat, seafood, poultry, or pasta), reheated foods
155 F Ground meat (except poultry), injected hams or roasts, ground seafood
145 F Seafood, Steaks/chops (of beef, pork, veal, or lamb), roasts (of beef, pork, veal or lamb)

Roasts should remain at 145 for 4 minutes. All other items should remain at the appropriate temp for 15 seconds.